Confluence部署 部署环境
Centos7.6
Confluence7.13.8
Mysql 5.7
jdk1.8.0
Nginx1.20.2
1.获取软件包
wget https://www.atlassian.com/software/confluence/downloads/binary/atlassian-confluence-7.13.8-x64.bin
更多版本号见https://www.atlassian.com/software/confluence/download-archives
2.下载mysql插件包
Mysql5.7版本官方推荐使用5.1.xx版本,Mysql官方5.1最新版本为5.1.49
更多版本见https://downloads.mysql.com/archives/c-j/
wget https://downloads.mysql.com/archives/get/p/3/file/mysql-connector-java-5.1.49.tar.gz
3.系统环境配置
sed -i 's/SELINUX=enforcing/SELINUX=disabled/g' /etc/selinux/config
systemctl stop firewalld
systemctl disable firewalld
yum install java-1.8.0-openjdk-devel -y
4.安装配置mysql数据库
详细部署可参考官方文档:https://confluence.atlassian.com/conf72/database-setup-for-mysql-982323619.html
#移除mariadb数据库
yum -y remove MariaDB* mariadb*
#添加mysql yum源
cat > /etc/yum.repos.d/mysql-community.repo  << EOF
[mysql57-community]
name=MySQL 5.7 Community Server
baseurl=https://mirrors.cloud.tencent.com/mysql/yum/mysql-5.7-community-el7-x86_64/
enabled=1
gpgcheck=0
gpgkey=file:///etc/pki/rpm-gpg/RPM-GPG-KEY-mysql
EOF
#安装msyql
yum -y install mysql-community-server
systemctl start mysqld
systemctl enable mysqld
grep "password" /var/log/mysqld.log #查看初始密码
mysql -u root -p
#重新设置root密码
set global validate_password_policy=0;
set global validate_password_length=1;
set password for 'root'@'localhost'=password('123456');
CREATE DATABASE confluence CHARACTER SET utf8mb4 COLLATE utf8mb4_bin;
grant all on confluence.* to 'confluence'@'localhost' identified by 'confluence';
#修改配置文件
vim /etc/my.cnf
[mysqld]
character-set-server=utf8mb4
collation-server=utf8mb4_bin
default-storage-engine=INNODB
max_allowed_packet=256M
innodb_log_file_size=2GB
optimizer_switch = derived_merge=off
transaction-isolation=READ-COMMITTED
binlog_format=row
log_bin_trust_function_creators = 1
#重启mysql使配置生效
systemctl restart mysqld
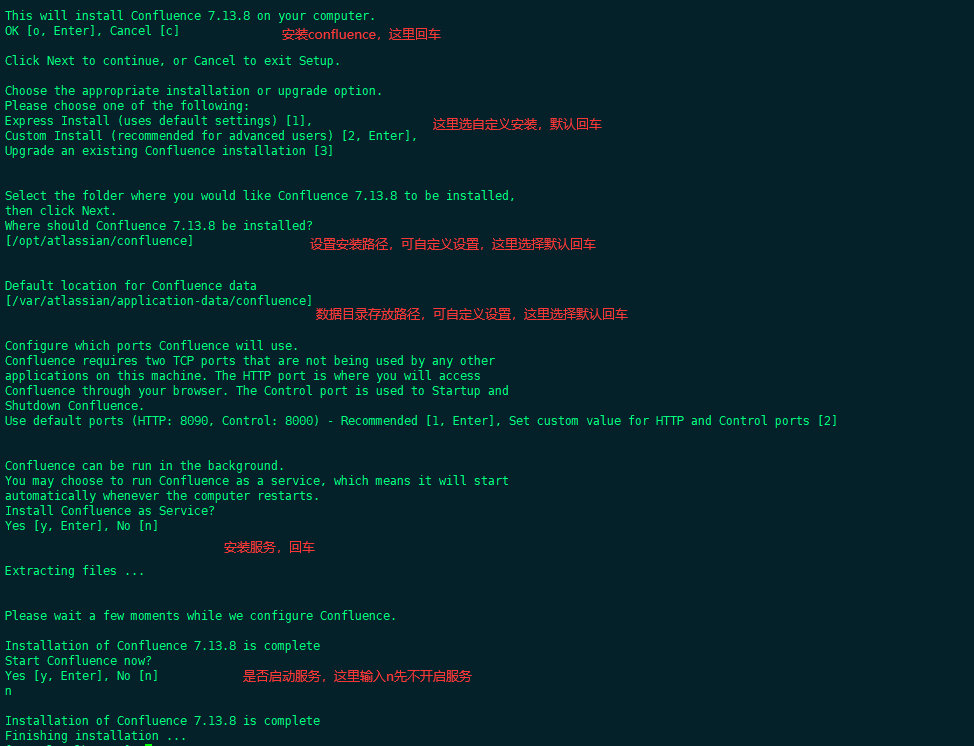
5.安装confluence
chmod +x atlassian-confluence-7.13.8-x64.bin
./atlassian-confluence-7.13.8-x64.bin
6.配置安装Mysql驱动程序
tar xf mysql-connector-java-5.1.49.tar.gz
mv mysql-connector-java-5.1.49/mysql-connector-java-5.1.49-bin.jar /opt/atlassian/confluence/confluence/WEB-INF/lib/
7.破解安装confluence
wget https://github.com/haxqer/confluence/releases/download/v1.3.3/atlassian-agent.jar
mv atlassian-agent.jar /opt/atlassian/confluence/
#编辑配置文件setenv.sh加入以下环境变量配置如下图所示位置
vim /opt/atlassian/confluence/bin/setenv.sh
CATALINA_OPTS="-javaagent:/opt/atlassian/confluence/atlassian-agent.jar ${CATALINA_OPTS}"
#运行confluence程序
/etc/init.d/confluence start
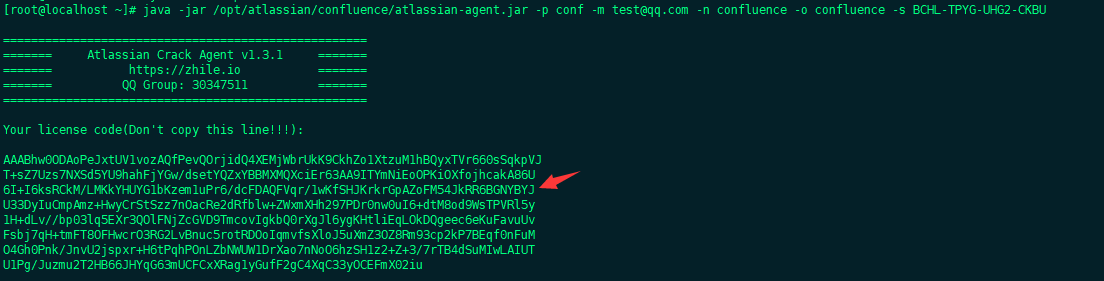
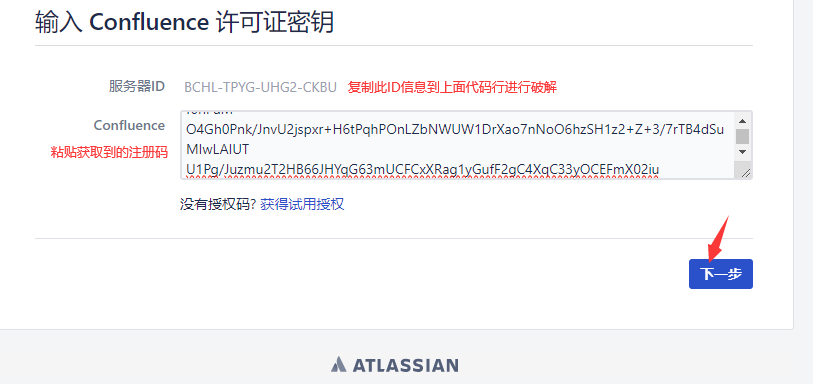
#将获取的服务器ID进行替换
java -jar /opt/atlassian/confluence/atlassian-agent.jar -p conf -m test@qq.com -n confluence -o confluence -s BCHL-TPYG-UHG2-CKBU
注:参数说明【-m邮箱】 【-n 用户名】 【-o 公司名】 【-s 服务器ID】 -p【用户密钥】
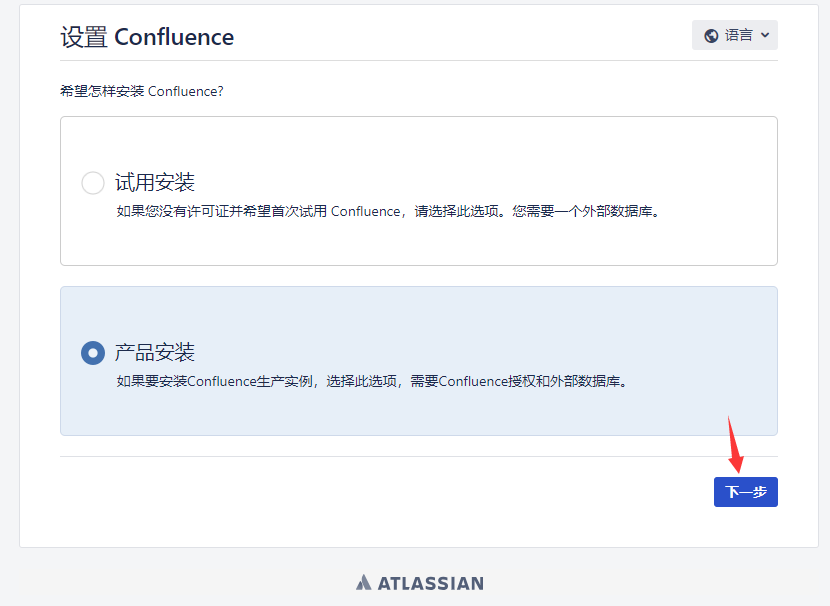
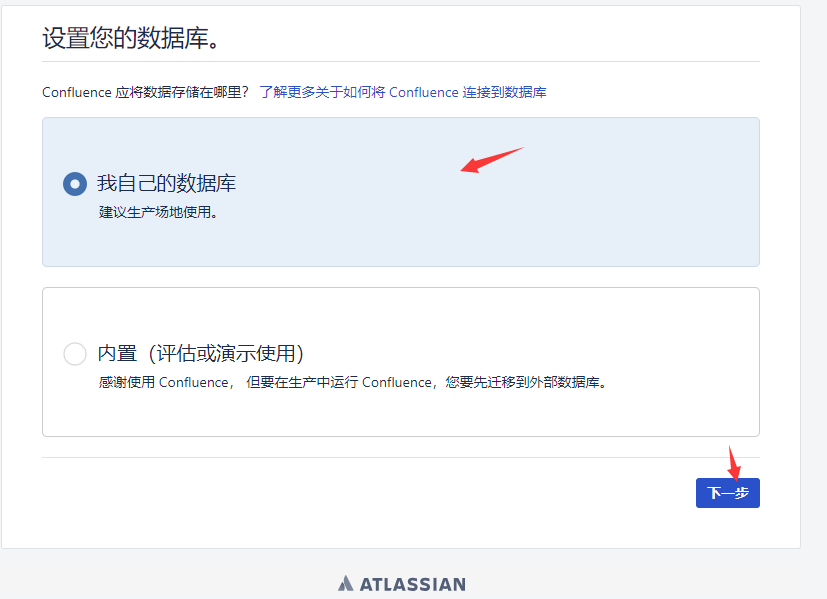
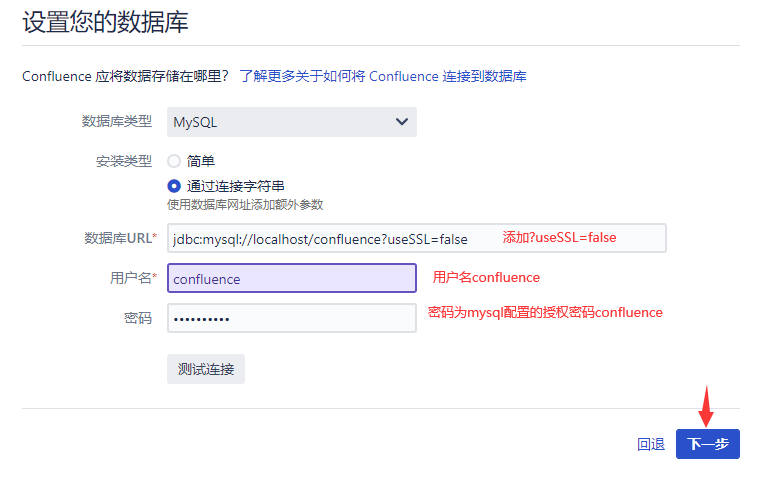
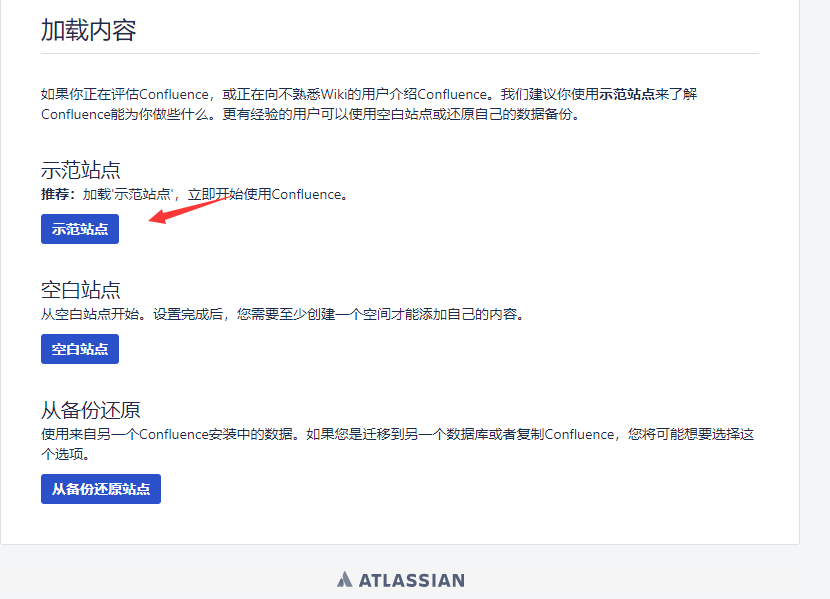
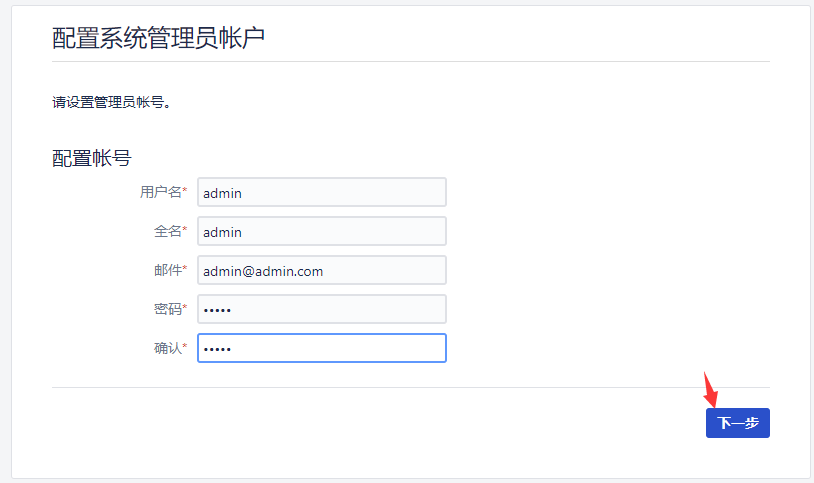
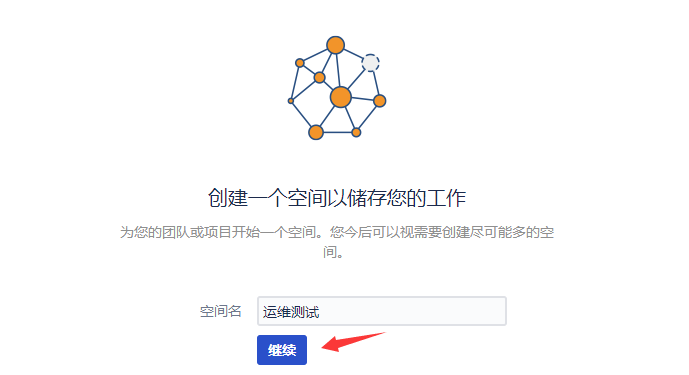
配置用户
到这就安装结束了。
8.使用Nginx代理
wget http://nginx.org/packages/centos/7/x86_64/RPMS/nginx-1.20.2-1.el7.ngx.x86_64.rpm
yum install yum-utils -y
rpm -ivh nginx-1.20.2-1.el7.ngx.x86_64.rpm
rm -rf nginx-1.20.2-1.el7.ngx.x86_64.rpm #删除下载的安装包
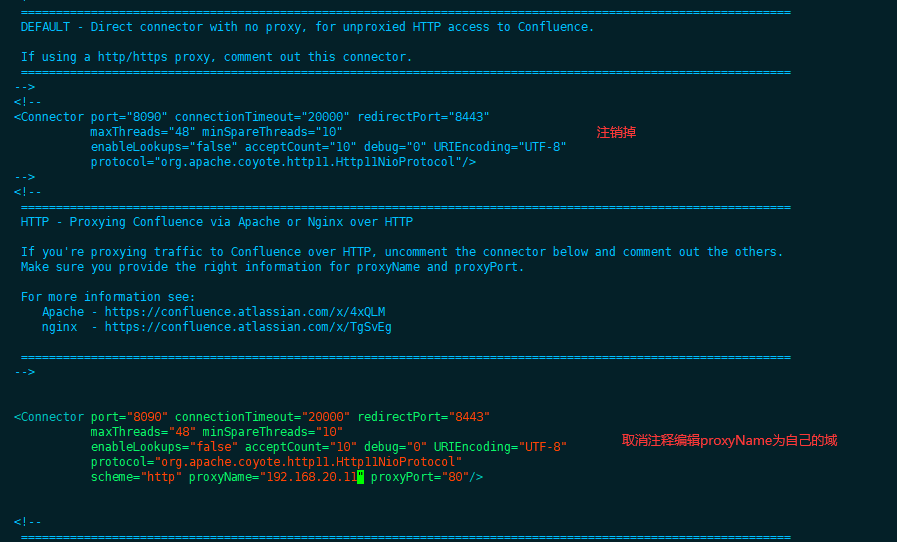
修改配置文件配置代理地址vim /opt/atlassian/confluence/conf/server.xml
参考链接:
1.使用http访问代理https://confluence.atlassian.com/confkb/how-to-use-nginx-to-proxy-requests-for-confluence-313459790.html
2.使用https访问代理https://confluence.atlassian.com/conf73/running-confluence-behind-nginx-with-ssl-991928804.html
#不使用https访问则使用以下配置
        <!--
         ==============================================================================================================
         HTTP - Proxying Confluence via Apache or Nginx over HTTP

         If you're proxying traffic to Confluence over HTTP, uncomment the connector below and comment out the others.
         Make sure you provide the right information for proxyName and proxyPort.

         For more information see:
            Apache - https://confluence.atlassian.com/x/4xQLM
            nginx  - https://confluence.atlassian.com/x/TgSvEg

         ==============================================================================================================
        -->


        <Connector port="8090" connectionTimeout="20000" redirectPort="8443"
                   maxThreads="48" minSpareThreads="10"
                   enableLookups="false" acceptCount="10" debug="0" URIEncoding="UTF-8"
                   protocol="org.apache.coyote.http11.Http11NioProtocol"
                   scheme="http" proxyName="192.168.20.11" proxyPort="80"/>

#使用https访问则使用以下配置
        <!--
         ==============================================================================================================
         HTTPS - Proxying Confluence via Apache or Nginx over HTTPS

         If you're proxying traffic to Confluence over HTTPS, uncomment the connector below and comment out the others.
         Make sure you provide the right information for proxyName and proxyPort.

         For more information see:
            Apache - https://confluence.atlassian.com/x/PTT3MQ
            nginx  - https://confluence.atlassian.com/x/cNIvMw
         ==============================================================================================================
        -->

        <Connector port="8090" connectionTimeout="20000" redirectPort="8443"
                   maxThreads="48" minSpareThreads="10"
                   enableLookups="false" acceptCount="10" debug="0" URIEncoding="UTF-8"
                   protocol="org.apache.coyote.http11.Http11NioProtocol"
                   scheme="https" secure="true" proxyName="192.168.20.11" proxyPort="443"/>
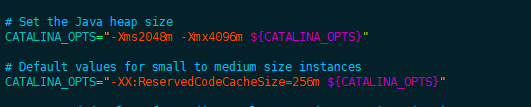
-Xms4096m:
此选项设置 JVM 的初始堆大小为 4096MB。初始堆大小是 JVM 在启动时分配的内存量。如果应用程序在运行时需要更多内存,JVM 可以根据需要动态增加堆大小,直到达到最大堆大小。
-Xmx4096m:
此选项设置 JVM 的最大堆大小为 4096MB。最大堆大小是 JVM 在运行时可以使用的最大内存量。如果应用程序需要超过初始堆大小的内存,JVM 将动态增加堆大小,直到达到最大堆大小。
编辑nginx配置文件vim /etc/nginx/conf.d/confluence.conf
# http访问
server  {
    listen 80;
    server_name 192.168.20.11;

    location / {
        client_max_body_size 100m;
        proxy_set_header X-Forwarded-Host $host;
        proxy_set_header X-Forwarded-Server $host;
        proxy_set_header X-Forwarded-For $proxy_add_x_forwarded_for;
        proxy_pass  http://localhost:8090;
    }
    location /synchrony {
        client_max_body_size 100m;
        proxy_set_header X-Forwarded-Host $host;
        proxy_set_header X-Forwarded-Server $host;
        proxy_set_header X-Forwarded-For $proxy_add_x_forwarded_for;
        proxy_pass  http://localhost:8091/synchrony;
        proxy_http_version 1.1;
        proxy_set_header Upgrade $http_upgrade;
        proxy_set_header Connection "Upgrade";
    }
}
# https访问
server {
    listen 192.168.20.11:80;
    server_name 192.168.20.11;

    listen 443 ssl;
    ssl_certificate     /usr/local/etc/nginx/ssl/nginx.crt;
    ssl_certificate_key /usr/local/etc/nginx/ssl/nginx.key;
    ssl_session_timeout  5m;
    ssl_protocols TLSv1 TLSv1.1 TLSv1.2;
    ssl_ciphers ECDHE-RSA-AES128-GCM-SHA256:ECDHE:ECDH:AES:HIGH:!NULL:!aNULL:!MD5:!ADH:!RC4;
    ssl_prefer_server_ciphers   on;

    location / {
        client_max_body_size 100m;
        proxy_set_header X-Forwarded-Host $host;
        proxy_set_header X-Forwarded-Server $host;
        proxy_set_header X-Forwarded-For $proxy_add_x_forwarded_for;
        proxy_pass http://localhost:8090;
    }
    location /synchrony {
        proxy_set_header X-Forwarded-Host $host;
        proxy_set_header X-Forwarded-Server $host;
        proxy_set_header X-Forwarded-For $proxy_add_x_forwarded_for;
        proxy_pass http://localhost:8091/synchrony;
        proxy_http_version 1.1;
        proxy_set_header Upgrade $http_upgrade;
        proxy_set_header Connection "Upgrade";
    }
}
如需配置上下文菜单可参考官方文档https://confluence.atlassian.com/confkb/how-to-use-nginx-to-proxy-requests-for-confluence-313459790.html
配置文件如下:vim /etc/nginx/conf.d/confluence.conf
server {
    listen 80;
    server_name www.example.com;
    location /confluence {
        client_max_body_size 100m;
        proxy_set_header X-Forwarded-Host $host;
        proxy_set_header X-Forwarded-Server $host;
        proxy_set_header X-Forwarded-For $proxy_add_x_forwarded_for;
        proxy_pass http://localhost:8090/confluence;
    }
    location /synchrony {
		client_max_body_size 100m;
        proxy_set_header X-Forwarded-Host $host;
        proxy_set_header X-Forwarded-Server $host;
        proxy_set_header X-Forwarded-For $proxy_add_x_forwarded_for;
        proxy_pass http://localhost:8091/synchrony;
        proxy_http_version 1.1;
        proxy_set_header Upgrade $http_upgrade;
        proxy_set_header Connection "Upgrade";
    }
}
# 使用https访问
# https访问
server {
    listen 192.168.20.11:80;
    server_name 192.168.20.11;

    listen 443 ssl;
    ssl_certificate     /usr/local/etc/nginx/ssl/nginx.crt;
    ssl_certificate_key /usr/local/etc/nginx/ssl/nginx.key;
    ssl_session_timeout  5m;
    ssl_protocols TLSv1 TLSv1.1 TLSv1.2;
    ssl_ciphers ECDHE-RSA-AES128-GCM-SHA256:ECDHE:ECDH:AES:HIGH:!NULL:!aNULL:!MD5:!ADH:!RC4;
    ssl_prefer_server_ciphers   on;

    location /confluence {
        client_max_body_size 100m;
        proxy_set_header X-Forwarded-Host $host;
        proxy_set_header X-Forwarded-Server $host;
        proxy_set_header X-Forwarded-For $proxy_add_x_forwarded_for;
        proxy_pass http://localhost:8090/confluence;
    }
    location /synchrony {
        proxy_set_header X-Forwarded-Host $host;
        proxy_set_header X-Forwarded-Server $host;
        proxy_set_header X-Forwarded-For $proxy_add_x_forwarded_for;
        proxy_pass http://localhost:8091/synchrony;
        proxy_http_version 1.1;
        proxy_set_header Upgrade $http_upgrade;
        proxy_set_header Connection "Upgrade";
    }
}
配置上下问菜单需修改配置文件vim /opt/atlassian/confluence/conf/server.xml,找到以下内容进行替换
<Context path="" docBase="../confluence" debug="0" reloadable="false">

and change it to: 并将其更改为:

<Context path="/confluence" docBase="../confluence" debug="0" reloadable="false">
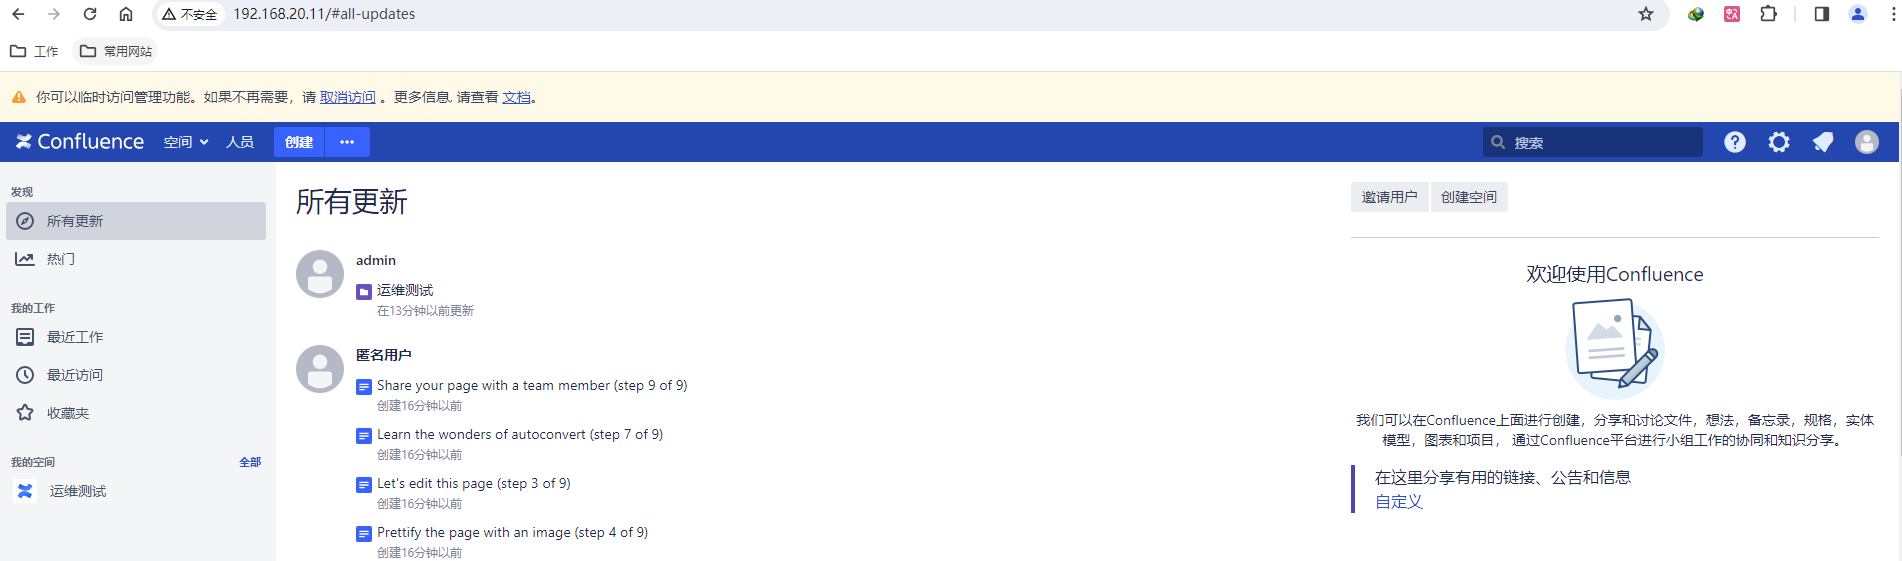
5.测试访问
/etc/init.d/confluence restart
systemctl start nginx
systemctl enable nginx
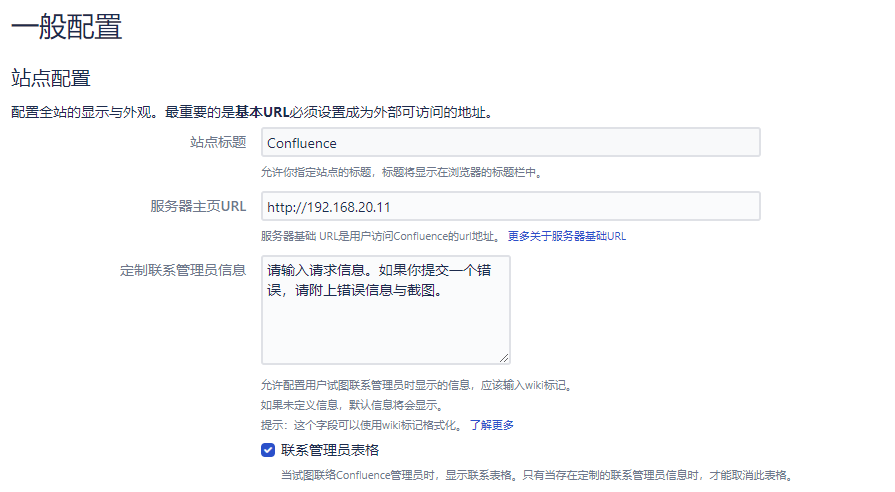
进入设置修改访问地址url将192.168.20.11:8090替换为192.168.20.11
更改后点击保存即可。
有关confluence的备份及迁移恢复见文档:https://blog.myhappiness.top/2024/03/07/confluence-Backup-and-Recovery/